

Efficiently Managing Partial Commits in Git
Git is a sophisticated version control tool, but there may be occasions when you just want to commit a portion of your changes to a file. This requirement is frequently encountered while working on many features or bug fixes at the same time and want to break them into discrete commits for clarity and better project management.
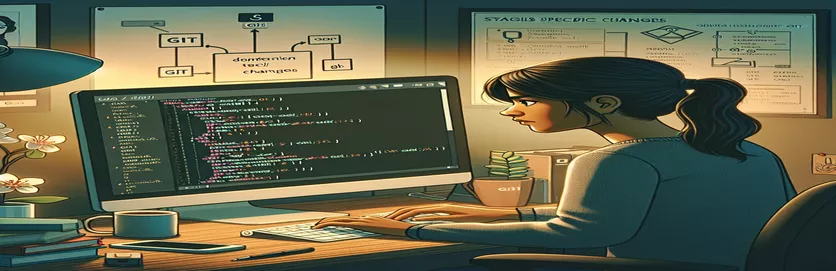
In this post, we'll look at how to selectively stage and commit certain lines of code changes in Git. Whether you're an experienced developer or new to Git, learning to commit only a portion of a file's changes can significantly improve your workflow and keep your commit history clear and relevant.
| Command | Description |
|---|---|
| git add -p | Allows you to interactively choose which modifications to stage. It displays each modification and allows you to decide whether to stage it. |
| git commit -m | Commits the staged modifications via message. Ensures that only the changes you reviewed and approved are committed. |
| git status | Displays the current state of the working directory and staging area, allowing you to assess which changes are ready for commit. |
| git reset HEAD <file> | Unstages changes from the staging area, allowing you to remove them if they were staged incorrectly. |
| Stage Hunk | In GUI tools, this option allows you to stage a group (hunk) of changes at once. |
| Stage Selected Lines | In GUI tools, this feature allows you to stage individual lines from different views. |
Mastering Partial Commits in Git
The scripts in the examples above show how to selectively stage and commit changes in Git, which is a useful ability when managing complicated projects with multiple changes. The first script utilizes the command line interface and the git add -p command. This command enables developers to interactively choose which modifications to stage. By showing each change separately, you can decide whether to stage it with options such as 'y' for yes, 'n' for no, or's' to further divide the change. This is especially handy when you have several changes in a file and just want to commit a subset, ensuring that your commits are tidy and focused.
After staging the desired changes, use the git commit -m command to commit them with a message. It's important to examine the staged changes using git status, which displays the current state of the working directory and staging area. If you erroneously stage modifications, use the git reset HEAD <file> command to unstage them. For those who prefer a graphical interface, programs like GitKraken or Sourcetree offer options such as 'Stage Hunk' or 'Stage Selected Lines' to do the same task. Additionally, utilizing VS Code with the GitLens plugin enables inline staging of individual lines, making the process more straightforward and visual.
Selective Staging of Changes with Git
Command Line Interface (CLI) script
git add -p# This command allows you to interactively select which changes to stage.# You'll be presented with each change and can choose 'y' to stage this change,# 'n' to skip, 's' to split the change into smaller parts, and more options.# Example:# $ git add -p# diff --git a/file.txt b/file.txt# --- a/file.txt# +++ b/file.txt# @@ -1,5 +1,9 @@
Committing Selected Changes using Git
Command Line Interface (CLI) script
git commit -m "Commit message for partial changes"# This command commits the changes you have staged interactively.# Ensure you've reviewed the changes before committing.# Use 'git status' to check what changes have been staged:# $ git status# On branch main# Changes to be committed:# (use "git reset HEAD <file>..." to unstage)# modified: file.txt
Selective Staging of Changes with Git GUI
The Graphical User Interface (GUI) method
# Open your Git GUI client, e.g., GitKraken, Sourcetree, or Git GUI.# Locate the file with changes you want to stage partially.# View the file's diff. Most GUI clients allow you to select specific# lines or hunks to stage by clicking checkboxes or using context menus.# Stage the selected changes. This typically involves right-clicking# the selected lines and choosing an option like 'Stage Hunk' or 'Stage Selected Lines'.# After staging the desired changes, commit them with an appropriate message.
Use Git Extensions for Selective Staging
VS Code Extension
# Install the GitLens extension in VS Code.# Open the file with changes in VS Code.# In the source control panel, you'll see the list of changes.# Click on the file to view its diff.# Use the inline staging buttons provided by GitLens to stage specific lines.# Hover over the left gutter to see the '+' button for staging individual lines.# Once you've staged the desired lines, commit the changes via the source control panel.
Advanced Methods for Partial Commits in Git
Patch files are another way to commit only part of a file's modifications in Git. Patch files allow you to generate a file that describes the changes you want to make, and then apply that patch to your repository. To generate a patch file, use the git diff command and redirect the output to a file. For example, git diff > changes.patch will generate a patch file that includes the differences in your working directory. You can then manually edit this patch file to contain only the changes you intend to commit.
Once you have your patch file, you may apply it using the git apply command. This strategy is especially handy when working with other developers or when you need to examine modifications before implementing them. Another advanced strategy is to use the git stash command with the -p option. This allows you to interactively stash changes, similar to git add -p, except instead of staging the changes for commit, it keeps them for later usage. This can be beneficial for temporarily deferring changes without committing them, providing you more flexibility in managing your work.
Common Questions Regarding Partial Commits in Git
- How can I stage only certain lines in a file?
- Use the git add -p command to choose which lines to stage.
- What happens if I stage the wrong lines?
- To unstage lines, use the git reset HEAD <file> command.
- Can I use a GUI for partial commits?
- Yes, tools such as GitKraken and Sourcetree allow you to stage individual lines or chunks of change.
- How can I build a patch file including my changes?
- To generate a patch file, use the command git diff > changes.patch.
- How should I apply a patch file?
- To apply a patch file to your repository, run the command git apply.
- What are the benefits of utilizing git stash -p?
- It allows you to interactively save changes, allowing you the freedom to manage your work without committing.
- How can I review the changes before committing?
- Use the git status and git diff commands to examine changes prior to staging and committing them.
- Can I use VS Code to commit partial changes?
- Yes, utilizing the GitLens addon in VS Code allows you to stage particular lines right from the editor.
Summarizing your changes in Git.
Handling partial commits in Git keeps your project's history organized and tidy. Using interactive staging commands, you can choose which changes to include in each commit. This aids in maintaining a logical sequence of changes and avoids the accumulation of unrelated adjustments. Furthermore, technologies such as GitKraken and VS Code's GitLens plugin make this process easier by offering graphical interfaces for staging specific lines or chunks of code. Advanced approaches, such as creating and applying patch files, provide additional flexibility by allowing you to better examine and manage changes before committing them to your repository.
Final thoughts on partial commits in Git.
Mastering the ability to commit only a subset of a file's changes in Git is critical for effective version management. It allows you to maintain a precise and meaningful commit history, with each commit representing a logical unit of work. You may better manage your changes and work with your team by utilizing interactive staging commands and tools, as well as sophisticated techniques such as patch files. This strategy not only helps your workflow, but it also increases the general quality and maintainability of your codebase.