

Decoding HTTP Status Codes: 403 vs 401
In the world of web development, determining the correct HTTP response for access control issues can be difficult. Specifically, when a user discovers a web page but lacks the proper permissions to access it, the choice between a 401 Unauthorized and a 403 Forbidden answer is critical.
The purpose of this article is to clarify the differences between these two HTTP status codes and provide advise on how to use them properly. Understanding the possibilities for each response allows developers to maintain good security and user experience on their websites.
| Command | Description |
|---|---|
| app.use(express.json()) | Middleware that parses incoming JSON requests and stores the resulting data in req.body. |
| res.status() | Specifies the HTTP status code for the response. |
| req.headers.authorization | Checks for an Authorization header in the request. |
| req.user.role | Checks the authorized user's role, generally after decoding user information from a token. |
| fetch('/admin', { method: 'GET' }) | Sends a GET request to the /admin endpoint. |
| .then(response => response.text()) | Handles the response by transforming it into text. |
| Event Listener | To manage user interactions, add an event listener to an element. |
| response.status | Determines the appropriate action based on the response's HTTP status code. |
Explaining Node.js and JavaScript Scripts
The first script is a backend implementation of Node.js and Express. To begin, run const app = express(); to create an Express application and app.use(express.json()); to parse incoming JSON requests. The middleware function isAuthenticated determines whether the request includes a Authorization header. If not, it sends a 401 Unauthorized response via res.status(401).send('401 Unauthorized');
The second script is a frontend implementation of JavaScript and Fetch API. An event listener is attached to a button with document.getElementById('fetchAdminData').addEventListener('click', ...), triggering a fetch request to the '/admin' endpoint. The request has the Authorization header. The response is then verified for 401 Unauthorized and 403 Forbidden status codes, using response.status. The appropriate alarm messages are displayed based on the response status. If the request is successful, the answer text is displayed in the element marked with document.getElementById('adminContent').innerText = data;. This mix of backend and frontend scripts ensures that only authenticated and authorized users have access to the protected admin area.
Distinguishing 403 Forbidden and 401 Unauthorized
Backend: Node.js with Express
const express = require('express');const app = express();const port = 3000;app.use(express.json());// Middleware to check authenticationconst isAuthenticated = (req, res, next) => {if (req.headers.authorization) {next();} else {res.status(401).send('401 Unauthorized');}};// Middleware to check authorizationconst isAuthorized = (req, res, next) => {if (req.user && req.user.role === 'admin') {next();} else {res.status(403).send('403 Forbidden');}};app.get('/admin', isAuthenticated, isAuthorized, (req, res) => {res.send('Welcome to the admin area!');});app.listen(port, () => {console.log(`Server running at http://localhost:${port}`);});
HTTP Response Status Management
Frontend: JavaScript and Fetch API
document.getElementById('fetchAdminData').addEventListener('click', () => {fetch('/admin', {method: 'GET',headers: {'Authorization': 'Bearer token_here'}}).then(response => {if (response.status === 401) {alert('401 Unauthorized: Please log in.');} else if (response.status === 403) {alert('403 Forbidden: You do not have access.');} else {return response.text();}}).then(data => {if (data) {document.getElementById('adminContent').innerText = data;}}).catch(error => console.error('Error:', error));});
Digging Deeper into HTTP Status Codes
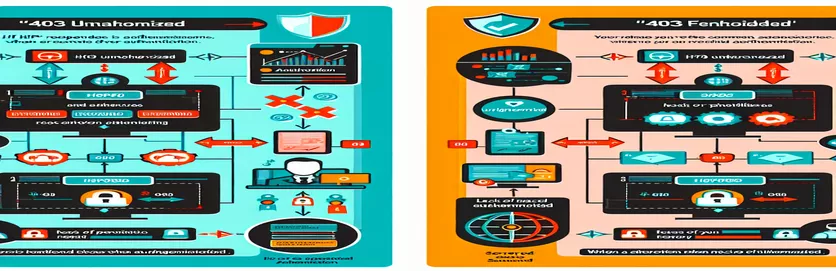
HTTP status codes are required for communication between a client and server. Understanding the distinction between 401 Unauthorized and 403 Forbidden replies is critical for installing effective security measures on a website. A 401 Unauthorized answer indicates that the client request was not completed due to the lack of appropriate authentication credentials for the target resource. In contrast, a 403 Forbidden answer indicates that the server understands the request but refuses to allow it. This distinction guarantees that users receive clear feedback on their access concerns, allowing them to determine whether they need to log in or if their user account lacks the essential permissions.
For web developers, selecting the correct status code is critical to maintaining a safe and user-friendly website. For example, if a user tries to access a restricted page without logging in, the server should respond with a 401 Unauthorized status and urge the user to supply proper credentials. If a logged-in user tries to visit a page without the necessary rights, the server should return a 403 Forbidden status. This clear distinction between authentication and permission aids in the prevention of illegal access and improves the overall security posture of the application.
Common Questions and Answers on HTTP Status Codes
- What exactly does the 401 Unauthorized status code mean?
- The status code 401 Unauthorized indicates that the request requires user authentication. To access the specified resource, the client must supply proper authentication credentials.
- What exactly does the 403 Forbidden status code mean?
- The 403 Forbidden status code indicates that the server understands but refuses to authorize the request. This usually occurs when the user does not have the proper rights.
- When should I utilize the 401 Unauthorized status code?
- Use the 401 Unauthorized status code when the user has to be authenticated to access the resource, but their credentials are missing or invalid.
- When should I utilize the 403 Forbidden status code?
- Use the 403 Forbidden status code if the user is authenticated but lacks the necessary permissions to access the resource.
- Can the 403 Forbidden status code be used to ban IP addresses?
- Yes, the 403 Forbidden status code indicates that access is banned due to IP blocking or other similar limitations.
- What is the difference between the 401 and 403 status codes?
- The primary distinction is that 401 Unauthorized shows a lack of valid login credentials, while 403 Forbidden indicates a lack of requisite rights even after authentication.
- Can a 401 status code contain a WWW-Authenticate header?
- Yes, a 401 Unauthorized response frequently includes a WWW-Authenticate header field with information on authentication.
- Is the 403 Forbidden error generated by the client or the server?
- The 403 Forbidden status code is a client error because it indicates that the client request was valid, but the server refused to complete it.
- How should I handle a 401 Unauthorized answer from the client side?
- When a client receives a 401 Unauthorized response, encourage them to log in or re-authenticate.
Final Thoughts About HTTP Status Codes
Finally, selecting the appropriate HTTP status code between 401 Unauthorized and 403 Forbidden is critical for proper access control in online applications. A 401 response requires users to authenticate, whereas a 403 response indicates inadequate permissions even after authentication. Implementing these codes effectively improves security and user experience while providing clear feedback on access concerns. This clarity helps consumers determine whether they need to log in or request additional permissions, resulting in a more secure and user-friendly website.